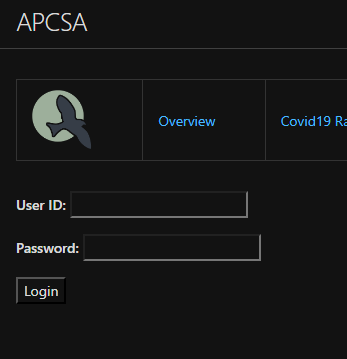
This lesson is about creating the layout for a login and sign-up page using HTML and SASS (a CSS preprocessor).
Wireframes are like blueprints for web pages. They show the structure of the page without any design elements like color or images.
Here’s a list of HTML elements you’ll typically need for a login/sign-up page and their purpose:
Container: This is a ‘div’ element that acts like a box or a wrapper for other elements. It’s used to group elements together and control their layout on the page.
Card: Another ‘div’ element, but this one is like a card on the screen that holds related items, such as input fields and buttons for the login form.
Username and Password Input Fields: These are ‘input’ elements where users type their username and password.
Each HTML element can have various properties that define its behavior and appearance:
id: This is a unique identifier for an element, which you can use in JavaScript to find and manipulate that specific element.
onclick: This is an attribute that tells the browser to execute a JavaScript function when the button is clicked.
Note: ‘onclick’ can be replaced with JavaScript event listeners. Event listeners are more powerful and flexible, but ‘onclick’ is simpler for beginners.
Here’s an example of the bare HTML code for a login form:
<div class="CONTAINER">
<!-- This is the card that holds the login fields and button -->
<div class="CARD">
<h3>Login</h3> <!-- The title of the form -->
<!-- The input field for the email, with a placeholder for user guidance -->
<input id="signInEmailInput" class="input" placeholder="Email">
<!-- The input field for the password -->
<input id="signInPasswordInput" class="input" placeholder="Password">
<!-- The login button with an onclick attribute that calls the login_user() function -->
<button class="signInButton" onclick="login_user()">Login</button>
</div>
</div>
<div class="CONTAINER">
<div class="CARD
">
<h3>Login</h3>
<input id="signInEmailInput" class="input" placeholder="Email">
<input id="signInPasswordInput" class="input" placeholder="Password">
<button class="signInButton" onclick="login_user()">Login</button>
</div>
</div>
<br>
# SASS
- SASS is used to design the wireframe
- Add styling to make log in page more apealing
## Code without SASS
## Code with SASS
- The HTML structure shown is for a login page. It consists of a main container that centers the card on the page. Inside the card, there are div elements for the email and password input fields and a container for the buttons.
# Copy this code into your custom-styles.scss
```scss
// Define color palettes using variables for easy reference and to maintain consistency.
$color1: #5D737E; // A cool, muted blue-grey.
$color2: #64B6AC; // A cool, calming teal.
$color3: #D0F4DE; // A light, minty green that adds a fresh feel.
$color4: #1B4332; // A dark, forest green for depth.
// The warm color palette adds a contrasting set of hues.
$color5: #FFB447; // A bright, sunny orange.
$color6: #FF3E4D; // A warm, vibrant red.
$color7: #FF1E56; // A deep, attention-grabbing pink.
$color8: #FFBD69; // A soft, warm peach.
// Animations for background color changes using keyframes.
@keyframes fade1 {
// This creates a smooth transition between colors of the cool palette over time.
0%, 100% { background-color: $color1 }
25% { background-color: $color2 }
50% { background-color: $color3 }
75% { background-color: $color4 }
}
@keyframes fade2 {
// This creates a smooth transition between colors of the warm palette over time.
0%, 100% { background-color: $color5 }
25% { background-color: $color6 }
50% { background-color: $color7 }
75% { background-color: $color8 }
}
// Styles for the login container.
.login-container {
display: flex; // Use flexbox for layout to center the card.
justify-content: center; // Center the card horizontally.
align-items: center; // Center the card vertically.
color: black; // Set the text color to black.
.card {
width: 300px; // Set a fixed width for the card.
padding: 20px; // Add space inside the card.
border-radius: 10px; // Rounded corners for the card.
box-shadow: 0px 0px 10px rgba(0, 0, 0, 0.1); // Subtle shadow for depth.
animation: fade1 5s ease infinite; // Apply the cool color fading animation.
}
.card2 {
// Styles for a second card, if present, with a warm color fading animation.
width: 300px; // Same fixed width as the first card.
padding: 20px; // Same padding as the first card.
border-radius: 10px; // Same rounded corners as the first card.
box-shadow: 0px 0px 10px rgba(0, 0, 0, 0.1); // Same shadow for consistency.
animation: fade2 5s ease infinite; // Apply the warm color fading animation.
}
h3 {
margin-bottom: 20px; // Space below the header for visual separation.
}
.input {
width: 100%; // Make the input fields full width of the card.
padding: 10px; // Padding inside the input fields for better text visibility.
margin-bottom: 10px; // Space below each input field.
}
}
# overview of userDbRequest function (part 1 of the login/signup puzzle)
### what does this even do?
- primary function is to add data to our frontend html fragment, which will store our data.
- this would be creating data in our frontend database view which users can see with authentication aka login. (part 2)
<!-- HTML table fragment for page -->
<table>
<thead>
<tr>
<th>Name</th>
<th>ID</th>
<th>Age</th>
</tr>
</thead>
<tbody id="result">
<!-- javascript generated data -->
</tbody>
</table>
this html fragment represents our table which we fill with data using our function.
```python
function userDbRequest() {
// prepare HTML result container for new output
const resultContainer = document.getElementById("result");
// set options for cross origin header request
const options = {
method: 'GET', // *GET, POST, PUT, DELETE, etc.
mode: 'cors', // no-cors, *cors, same-origin
cache: 'default', // *default, no-cache, reload, force-cache, only-if-cached
credentials: 'include', // include, *same-origin, omit
headers: {
'Content-Type': 'application/json',
},
};
fetch("http://localhost:8085/api/person/", options)
.then(response => {
if (response.status !== 200) {
const errorMsg = 'Database response error: ' + response.status;
console.log(errorMsg);
const tr = document.createElement("tr");
const td = document.createElement("td");
td.innerHTML = errorMsg;
tr.appendChild(td);
resultContainer.appendChild(tr);
return;
}
// valid response will contain json data
response.json().then(data => {
console.log(data);
for (const row of data) {
// tr and td build out for each row
const tr = document.createElement("tr");
const name = document.createElement("td");
const id = document.createElement("td");
const age = document.createElement("td");
// data is specific to the API
name.innerHTML = row.name;
id.innerHTML = row.email;
age.innerHTML = row.age;
// this build td's into tr
tr.appendChild(name);
tr.appendChild(id);
tr.appendChild(age);
// add HTML to container
resultContainer.appendChild(tr);
}
})
})
// catch fetch errors (ie ACCESS to server blocked)
.catch(err => {
console.error(err);
const tr = document.createElement("tr");
const td = document.createElement("td");
td.innerHTML = err + ": " + url;
tr.appendChild(td);
resultContainer.appendChild(tr);
});
}
// This function is called when the user clicks the login button.
function login_user() {
    // STEP ONE: PREPARE THE REQUEST

    // Create a Headers object to set the type of content we're sending, which is JSON.
    var myHeaders = new Headers();
    myHeaders.append("Content-Type", "application/json");

    // Collect user input from the login form fields for email and password.
    var raw = JSON.stringify({
        "email": document.getElementById("signInEmailInput").value,
        "password": document.getElementById("signInPasswordInput").value

        // Uncomment the following lines for quick testing with pre-defined credentials.
        //"email": "test@gmail.com",
        //"password": "123Lebron!"
    });

    // Print the collected data to the console for debugging purposes.
    console.log(raw);

    // Set up the options for the fetch request, including method, headers, and body.
    var requestOptions = {
        method: 'POST', // The method is POST because we're sending data.
        headers: myHeaders, // Attach the headers, including our content type.
        credentials: 'include', // Include credentials in case of cookies, etc.
        body: raw, // Attach the user input data as the request body.
        redirect: 'follow' // Follow any redirects automatically.
    };

    // STEP TWO: MAKE THE REQUEST TO THE SERVER

    // Send the request to the backend to authenticate the user.
    fetch("http://localhost:8085/authenticate", requestOptions)
    .then(response => {
        // If the response is not OK, handle the different kinds of login errors.
        if (!response.ok) {
            const errorMsg = 'Login error: ' + response.status;
            console.log(errorMsg);

            // Switch statement to handle different HTTP status codes.
            switch (response.status) {
                case 401:
                    // Status 401 means unauthorized, indicating wrong credentials.
                    alert("Incorrect username or password");
                    break;
                case 403:
                    // Status 403 means forbidden, indicating lack of permission.
                    alert("Access forbidden. You do not have permission to access this resource.");
                    break;
                case 404:
                    // Status 404 means not found, indicating the user doesn't exist.
                    alert("User not found. Please check your credentials.");
                    break;
                // More cases can be added for other HTTP status codes as needed.
                default:
                    // A default case to handle any other errors.
                    alert("Login failed. Please try again later.");
            }

            // Reject the promise if there is an error.
            return Promise.reject('Login failed');
        }
        // If the response is OK, convert it from JSON to a text format.
        return response.text()
    })
    .then(result => {
        // If the login is successful, print the result to the console.
        console.log(result);
        // Redirect the user to their account page.
        window.location.href = "http://127.0.0.1:4100/Login-Lesson/account";
    })
    .catch(error => {
        // If there is a problem during the fetch or during processing, log the error.
        console.error('Error during login:', error);
    });
}
  Cell In[1], line 1
    // This function is called when the user clicks the login button.
    ^
SyntaxError: invalid syntax
this function sends an authentication request to backend, which then redirects to our database page.
the authentication request in question is located in spring_portfolio/mvc/jwt/JwtApiController.java
FOR REFERENCE:
@PostMapping("/authenticate")
	public ResponseEntity<?> createAuthenticationToken(@RequestBody Person authenticationRequest) throws Exception {
		authenticate(authenticationRequest.getEmail(), authenticationRequest.getPassword());
		final UserDetails userDetails = personDetailsService
				.loadUserByUsername(authenticationRequest.getEmail());
		final String token = jwtTokenUtil.generateToken(userDetails);
		final ResponseCookie tokenCookie = ResponseCookie.from("jwt", token)
			.httpOnly(true)
			.secure(true)
			.path("/")
			.maxAge(3600)
			.sameSite("None; Secure")
			// .domain("example.com") // Set to backend domain
			.build();
		return ResponseEntity.ok().header(HttpHeaders.SET_COOKIE, tokenCookie.toString()).build();
	}

	private void authenticate(String username, String password) throws Exception {
		try {
			authenticationManager.authenticate(new UsernamePasswordAuthenticationToken(username, password));
		} catch (DisabledException e) {
			throw new Exception("USER_DISABLED", e);
		} catch (BadCredentialsException e) {
			throw new Exception("INVALID_CREDENTIALS", e);
		} catch (Exception e) {
			throw new Exception(e);
		}
	}
this is the authentication method we are calling to, which provides us with the cookie we need for access to our database.
function fetchUserData() {
    var requestOptions = {
      method: 'GET',
      mode: 'cors',
      cache: 'default',
      credentials: 'include',
    };

    fetch("http://localhost:8085/api/person/jwt", requestOptions)
      .then(response => {
              if (!response.ok) {
                  const errorMsg = 'Login error: ' + response.status;
                  console.log(errorMsg);

                  switch (response.status) {
                      case 401:
                          alert("Please log into or make an account");
                          window.location.href = "http://127.0.0.1:4100/Login-Lesson/loginSignup";
                          break;
                      case 403:
                          alert("Access forbidden. You do not have permission to access this resource.");
                          break;
                      case 404:
                          alert("User not found. Please check your credentials.");
                          break;
                      // Add more cases for other status codes as needed
                      default:
                          alert("Login failed. Please try again later.");
                  }

                  return Promise.reject('Login failed');
              }
              return response.json();
              // Success!!!
          })
      .then(data => {
        // Display user data above the table
        const userDataContainer = document.getElementById("userData");
        userDataContainer.innerHTML = `
          <img src="/Login-Lesson/images/defaultUser.png" width="250" height="250">
          <h1><strong>${data.name}</strong></h1>
          <p>Email: ${data.email}</p>
          <p>Age: ${data.age}</p>
          <p>ID: ${data.id}</p>
          <button onclick="signOut()">Sign Out</button>
        `;
        console.log(data);
      })
      .catch(error => console.log('error', error));
}
this function resides in our database display on our frontend, and does 2 things
@GetMapping("/jwt")
@PreAuthorize("isAuthenticated()")  // Restrict access to authenticated users
public ResponseEntity<Person> getAuthenticatedPersonData() {
    String username = SecurityContextHolder.getContext().getAuthentication().getName();
    Person person = repository.findByEmail(username);  // Retrieve data for the authenticated user
    return new ResponseEntity<>(person, HttpStatus.OK);
}
function signup_user() {
    var requestOptions = {
        method: 'POST',
        mode: 'cors',
        cache: 'no-cache'
    };

    // Collect user input
    let fetchName = document.getElementById("signUpNameInput").value;
    let fetchEmail = document.getElementById("signUpEmailInput").value;
    let fetchPassword = document.getElementById("signUpPasswordInput").value;
    let fetchDob = document.getElementById("signUpDobInput").value;

    // Posting in backend only works if user input is sent as query parameters
    let requestURL = `http://localhost:8085/api/person/post?email=${fetchEmail}&password=${fetchPassword}&name=${fetchName}&dob=${fetchDob}`;
    console.log(requestURL)

    fetch(requestURL, requestOptions)
    .then(response => {
            if (!response.ok) {
                return response.text().then(errorMsg => {
                    alert('Error: ' + errorMsg);
                });
            }
            // Success!!!
            alert("Signup Complete");
            // Redirect to Database location
            location.reload();
        })
        .catch(error => {
            alert('An unexpected error occurred: ' + error.message);
        });
}
.authorizeHttpRequests(auth -> auth
	.requestMatchers("/authenticate").permitAll()
    .requestMatchers("/mvc/person/update/**", "/mvc/person/delete/**").authenticated()

    // .requestMatchers("/api/person/post/**", "/api/person/delete/**").authenticated()
    // Removed so anyone without a cookie can post

    .requestMatchers("/api/person/delete/**").authenticated()
    .requestMatchers("/**").permitAll()
)
@PostMapping( "/post")
// @RequestParam is why user input needs to be a parameter
public ResponseEntity<Object> postPerson(@RequestParam("email") String email,
                                         @RequestParam("password") String password,
                                         @RequestParam("name") String name,
                                         @RequestParam("dob") String dobString) {
    Date dob;
    // dob handling
    try {
        dob = new SimpleDateFormat("MM-dd-yyyy").parse(dobString);
    } catch (Exception e) {
        return new ResponseEntity<>(dobString +" error; try MM-dd-yyyy", HttpStatus.BAD_REQUEST);
    }
    // A person object WITHOUT ID will create a new record with default roles as student
    Person person = new Person(email, password, name, dob);
    personDetailsService.save(person);
    return new ResponseEntity<>(email +" is created successfully", HttpStatus.CREATED);
}